30 June 2011

True Southern Cornbread

We Southerners have some pretty fixed ideas about cornbread and how it should be prepared. As you know, I grew up in Louisiana. Louisiana is on the Gulf coast in the Deep South and this is our family recipe for cornbread. So let's get something settled right off the bat.

It's not cornbread if it is not baked in a cast iron skillet!

This is the #1 rule. If you bake it in some other pan, you will get a facsimilie, but it is just not the same. I see recipes all the time now that call for baking it in a Pyrex dish or a non-stick baking pan and I just cringe! 
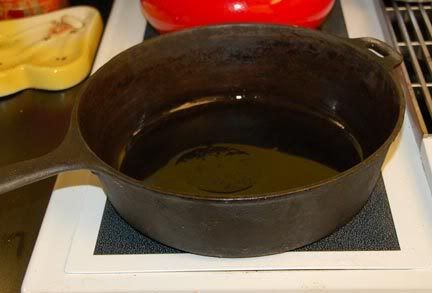
Cornbread should have a nicely browned, crispy crust on the bottom and sides. To achieve that crust, you need to heat your iron skillet on the stove top with some oil in it while you are mixing up your batter. When you pour your batter into the hot skillet, it starts to form the beautiful crust. With other pans you do not get this crispy brown crust.

Then there is also the business about the ratio of cornmeal to flour, and whether or not you should add any sugar. Traditional cornbread should not be more than a 1:4 ratio of flour to cornmeal. If you see a recipe that calls for equal parts or 1:2, put it aside and go look for another recipe. That's not southern cornbread. As to the sugar, there are many southerners that eschew the use of it altogether. Sugar helps with browning, so we add just a small amount of sugar to our batter. You can leave it out, if you so desire.

Cornbread goes with so many different southern foods that it is something we serve fairly often. It is our favourite accompaniment for vegetable soup, as well as peas, greens and many other veggies..

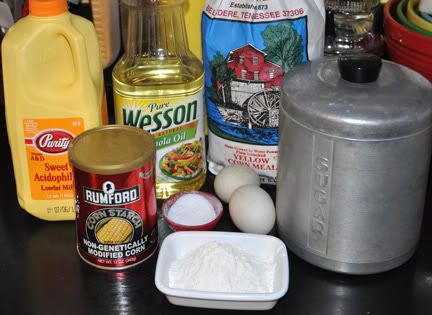
While not absolutely necessary, I like to use stone ground cornmeal and I get it from Falls Mill, an old waterwheel mill in Belvidere, TN, which makes it a local product for me. Today I'm also using organically grown free-range duck eggs from my CSA box, but normally I use chicken eggs.


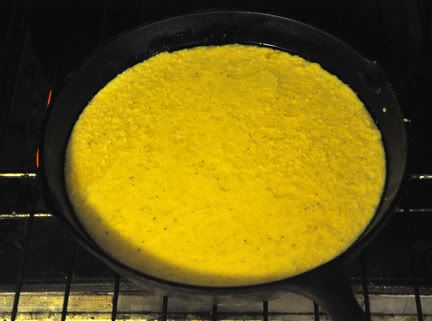
Heating the skillet - you can see how the oil is getting hot.


Wet and dry ingredients

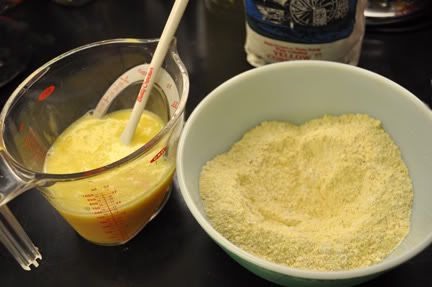
Note: If you use duck eggs, they will need to be beaten more than chicken eggs to incorporate some air.

Ready to bake


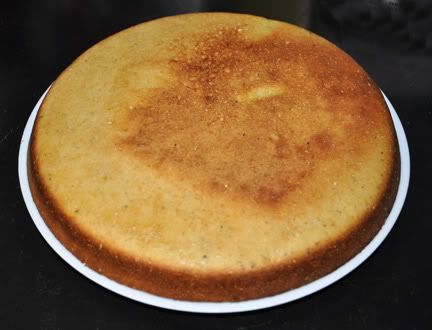
Lovely cornbread turned out of skillet


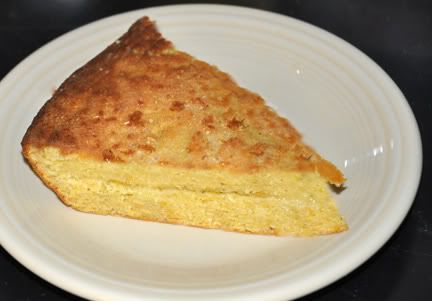
Sliced and ready to serve on one of my favourite Fiesta plates


People at this house could inhale this cornbread. Tori and I have both been known to eat only cornbread for supper sometimes. LOL. This is one of those recipes where I don't really need to get the recipe out to look at. I just make it. It's really easy and if you try it I hope you will enjoy it as much as we do.


Country Cornbread
Serves 8

3 Tbsp oil, divided
2 cups yellow corn meal
6 Tbsp flour
2 tsp sugar
4 tsp baking powder
2 tsp salt
4 eggs, beaten
2 cups milk
8 pats of butter

Preheat oven to 425°F.

Heat cast iron skillet on stove top with 1 Tbsp oil.

In a large bowl mix the dry ingredients. In a batter bowl, whisk the eggs, 2 Tbsp oil, and milk. Pour the liquid ingredients into dry ingredients and stir to just combine. Pour cornbread batter into hot iron skillet and bake about 30 minutes or till done.

Cut in 8 wedges. Slice the wedges in half horizontally and place a pat of butter in each one. Serve immediately!

With this recipe I'm joining:
Michael Lee's Foodie Friday @ Designs By Gollum
Friday's Favourites by Sandi & Bill @ Whistlestop Cafe Cooking
Kim's Recipes to Run On

Thanks so much for stopping by today!

namasté,
Bookmark and Share

29 June 2011

Canning in the Summer Time


I grew up canning. I did. When I was a child I was lucky enough to get to spend many summers with my grandparents. My grandfather always had a huge garden. What wasn't immediately eaten or given away, was "put up" by my grandmother. She canned, froze, preserved, pickled and otherwise prepared the food for long term storage, so they would be well-stocked for the off season. I thought that almost everybody did that, and was surprised to later find out how lucky we were. There were rarely any commercially canned goods in Mimi's pantry. Instead, it looked like this:

Mimi's utility room encompassed her canning Kitchen. In addition to the laundry equipment the utility room had countertops, a moveable centre table, a double sink with one extra deep bowl, a gas triple burner, a chest freezer and a spare refrigerator. I was grown before I realized what a treasure that really was. As many of you know, we are working on a plan to build a new house out at our farm. I seriously thought about how to incorporate a canning Kitchen. However, it came to me the other day that as the log house is going to become a "guest house", and how I already have that Kitchen set up for easy canning and dehydrating, I can simply do all my canning there.

My grandparents were for the most part self-sufficient in the food department. They had cattle, chickens (for both eggs and eating), several ponds for fish, muscadines, peaches, plums, figs, bush cherries, apples, pears and strawberries in addition to the garden. They also foraged (asparagus and blackberries mostly) and both my grandfather and great-grandfather hunted. To my knowledge they never raised pigs, but instead would trade a steer for a couple of hogs in the autumn and sometimes goats also. And for many years my great-grandmother kept a milk cow, so all their dairy was homegrown. Probably their main food purchases were flour, cornmeal, salt, shrimp, crabs and rice. I look back to that with some nostalgia and sometimes think I'd like to have a similar setup (sans the mammals), but I am realistic enough to know that at this point in my life, I don't want to sign up for keeping animals. But the gardening and canning remain right up my alley.

For quite some time home canning seemed to be going out of style, but I have been encouraged the last few years to see people reviving this household art. You know what is in your food and there is just no substitute for some of the recipes. You can also put up exotic preserves and pickles that would cost an arm and a leg at gourmet food purveyors. I know many people are afraid of canning as they are worried about making people ill, but I'd like to encourage anyone to give it a try. As long as you follow guidelines set out by the National Centre for Food Preservation or the Ball Blue Book, your food will be safe, healthier and certainly tastier than anything you can purchase.


Typically during the summer I spend most of my time at the farm - gardening, canning, pickling, preserving and freezing. Due to the MDS and transplant, I haven't been able to do that the last couple of years.

At my Kitchen here in town I have a Jennair cooktop. When we remodelled I chose glass surface burners, rather than the traditional coils. (Gas was not an option at the time.) After a number of years I learned you aren't supposed to use cast iron on a glass cooking surface! 
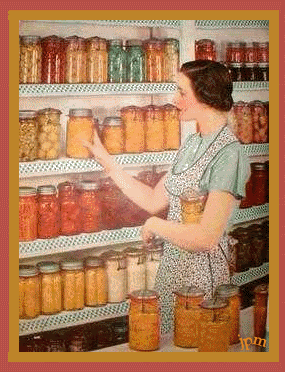
After all this time I haven't had any problems with that. Not wanting to miss out on all the canning fun last year, I put up a number of different pickles and preserves here in town. And as I couldn't go move all my canning supplies and utensils, I "made do" with the things I had here.

This led to a second no-no with glass cooktops - the size of the pot on the burner. I was subbing my shrimp boil pot for the water bath canner. This pot is considerably larger than the recommended 2" larger than the burner. To my dismay, this resulted in a cracked glass top. Fortunately I had gotten two of the plug-in units when we remodelled, but had never used the second one. I keep the cooktop set up with the grill on the right and the burners on the left. It was an easy replacement. For the rest of last year's preserves, I used my 8 quart stockpot for the canner. This necessitated using smaller jars and more batches in the BWB.


As I'm still not able to be out at the farm on a regular basis, and as I am not interested in purchasing another glass plug-in unit, I've been looking around for a better idea for canning in the Kitchen in town. I've known for years about a larger raised heating coil that Jennair makes called "big pot canning element". It plugs into a coil burner unit just like any other coil. But it is larger and taller with underside supports. This raises the bottom of the pot above the cooktop surface to allow for better airflow and the special air ring around the supports eliminates the problem of heat build-up under the oversized pots that can damage the component parts of the cooktop. The larger size makes the heating circle of the coil much more similar in size to a canner. It's my understanding that these big pot canning elements are available for most stoves that use electric coil elements. If you are canning on an electric stove, it's worth checking out.


Sometimes eBay really comes in handy! And this is where I get to the "thrifty" part of my post. I was able to purchase an older NIB big pot canning element and a gently used coil cooktop plug-in unit for less than a quarter of their current retail price. 
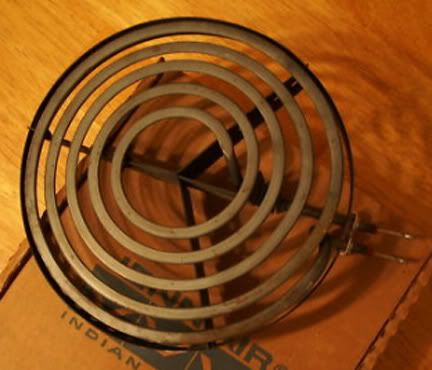
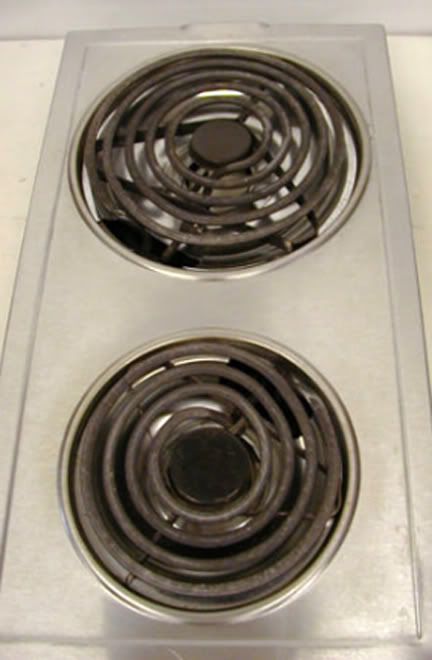
Don't you just love deals like that? Now all I have to do is unplug either the grill or the glass surface plug-in and replace it with the coil plug-in and canning element. I'm excited and am ready to start making some preserves and jam!

I'm joining:
Jenny @ off on my tanget for Alphabe-Thursday where this week's Letter is "K" - K is for "Kitchen", where all my canning takes place.
Thrifty Treasures Sunday at Southern Hospitality
Nifty Thrifty Tuesday at Coastal Charm

Thanks so much for stopping by today! Happy canning.

namasté,
Bookmark and Share

08 June 2011

Abbey & Donnie: THE WEDDING


All the planning, all the shopping for attire, all the fittings, all the organizing, and all the details culminate tonight. And all of a sudden the last eighteen months seem to have flown by! At 5:00pm EDT there will be the most fabulous affair at Disney's Wedding Pavillion on the shores of the Seven Seas Lagoon. My firstborn daughter will marry the love of her life. The Guy and I couldn't be happier. We're happy for Abbey because she is so happy. And we are happy to be welcoming such a wonderful son-in-law into our family. Abbey and Donnie, we love you!


In honour of this most auspicious occasion, I set a wedding table using Abbey's colours of Ivory and Gold. All of my diva friends:
Elaine @ Dishing with Carafaye,
Daphne @ Tabletop Time,
Rebecca @ Mybecca's Vintage Tables, and
Candy @ The Little Round Table,
are also doing wedding tables to help us celebrate. I was so thrilled when they agreed to join me in this endeavour! Please check out their blogs for totally different, absolutely fabulous takes on a wedding table.

For favours, we chose to use Fiesta. Judi Noble, the art director at Homer Laughlin China, created this beautiful fairy tale castle design, which was put on both bud vases and tumblers.


The Bride was thrilled. The Maid of Honour was thrilled. Their mother was thrilled. By default the Groom and the Father of the Bride were thrilled. All the other wedding planning has been equally as fun and satisfying. The Disney wedding team is fabulous. Please join in our happiness and celebration today.

For the ivory and gold table, I used post-86 ivory Fiesta dishes along with my wedding crystal and flatware. This is the first time I've ever done such a monochromatic ivory table. Normally when I use Fiesta, it is an explosion of colours! And I don't normally dress it up so much with silver and crystal. But I love how it looks!


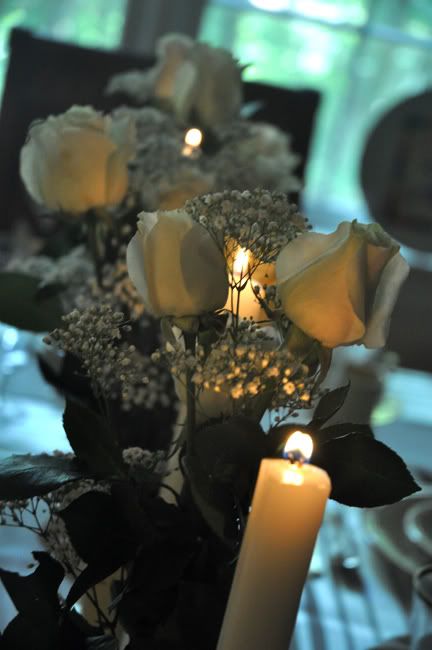
And look! Although there is not a lot of sky showing in the summer from this angle, it's my first ever on-purpose blue hour photo:

Click here if you are interested in learning more about Blue Hour Photography, including the daily times when you can make these shots in your area.

On today's table:
Midcentury ivory rayon tablecloth and napkins
Specially made for us ivory post-86 fairy tale Fiesta tumblers and bud vases
Ivory post-86 Fiesta plates and pyramid candleholders
Ivory Century butter base decorated in gold
Silver napkin rings I've had forever
Lenox Eternal goblets and sherbets (my wedding crystal - the original Barclay shape, discontinued 1988)
Flatware - Golden Centennial silverplate by International (my wedding flatware - also discontinued 1988 - What was going on that year?)
Candles from TJMaxx
Roses from Fresh Market


This post is linking up with:
Jenny @ off on my tanget for Alphabe-Thursday where this week's Letter is "H" - H is for "Happily Ever After", which is the ending line of all fairy tale weddings. And no one does a fairy tale wedding as Disney does.
Susan at Between Naps on the Porch for Tablescape Thursday, where I'm excited to share the wedding table,
Suzanne @ The Coloradolady for Vintage Thingy Thursday, because I'm afraid my crystal and flatware have become vintage ,
The Tablescaper for Seasonal Sunday, as June is the season for weddings, and
Marty @ A Stroll Through Life for TableTop Tuesday, in honour of Abbey and Donnie beginning their Together Stroll Through Life.

Thanks so much for stopping by today! Love and magical best wishes to all!

namasté,

Bookmark and Share